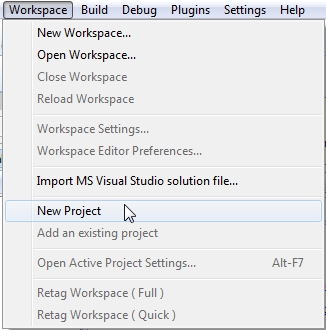
| 1. Open Codelite IDE
and go to main menu bar, Workspace
and select New Project |
 |
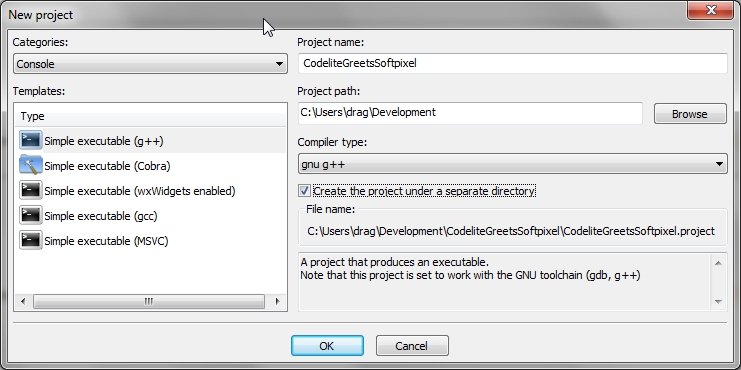
2. Select these info
for your SoftPixelEngine project
|
 |
| 3. Right click on
your project item (while in Workspace View) and select Settings... (it's the last one) |
 |
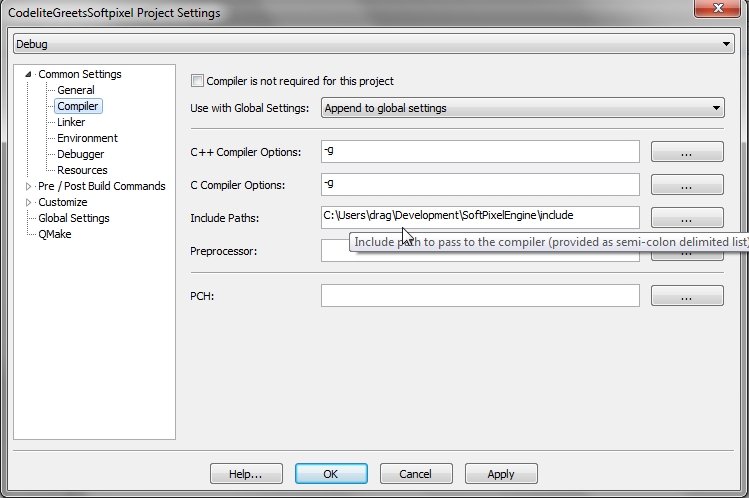
| 4. Go to Common Settings > Compiler and add this information: Include Paths: C:/YourPathToSoftpixel/SoftPixelEngine/include YourPathToSoftpixel = The location in the hard drive where you extracted SoftPixelEngine |
 |
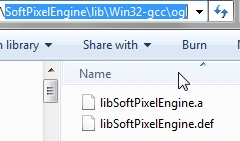
| 5. Go to Common Settings > Linker and add these information to: Library Paths: C:/YourPathToSoftpixel/SoftPixelEngine/lib/Win32-gcc/ogl YourPathToSoftpixel = The location in the hard drive where you extracted SoftPixelEngine Notes: Inclusion of the the library file (.a) is very specific to the combination of compiler and renderer we would like to use for our project. For example: Win32-gcc = Library compatible with MinGW (or GNU family of compilers) ogl = Library compatible with OpenGL renderer Libraries:
Add libSoftPixelEngine.a
(it's the only one .a file
located in the filepath above)
 Notes:
Whether I add SoftPixelEngine.a or libSoftPixelEngine.a always works in both cases for me, so I leave it default for integrity. |
| You must select the
compatible SoftPixelEngine.dll
file. Which type of library did you use? Go to this location and select the correct version that matches your compiler and renderer. C:/YourPathToSoftpixel/SoftPixelEngine/bin Copy the SoftPixelEngine.dll and place it in one of these locations, all of these cases work fine so choose the one that better suits your needs.
|
 |
| 6a. For Workspace
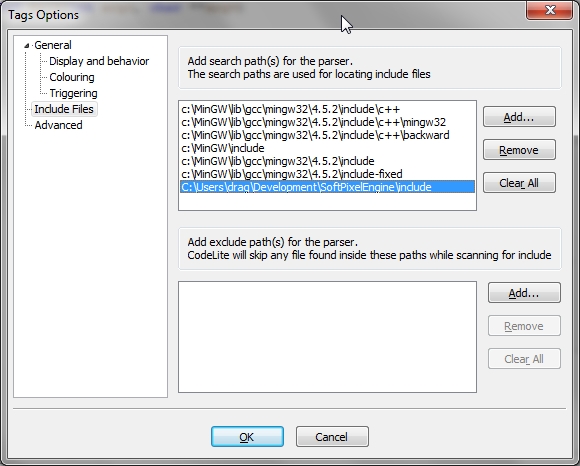
(works only for one Workspace at a time) In main menu bar (or right-click) go to Workspace > Workspace Settings... and hit the Add... button to add the include folder as a search path. 6b. For IDE (works once and for all) In main menu bar go to Settings > Tags Settings... Select Include Files and hit the Add... button to locate the include folder of SoftPixelEngine |
 |
| #include
<stdio.h> #include <softpixelengine.hpp> using namespace sp; int main(int argc, char **argv) { SoftPixelDevice* spDevice = createGraphicsDevice( video::DRIVER_OPENGL, dim::size2di(640, 480), 32, "CodeLite Greets SoftPixel" ); video::VideoDriver* spDriver = spDevice->getVideoDriver(); scene::SceneManager* spSceneMgr = spDevice->getSceneManager(); spSceneMgr->setLighting(true); scene::Camera* camera = spSceneMgr->createCamera(); scene::Light* light = spSceneMgr->createLight(scene::LIGHT_DIRECTIONAL); scene::Mesh* mesh = spSceneMgr->createMesh(scene::MESH_CUBE); mesh->setPosition(dim::vector3df(0, 0, 3)); while (spDevice->updateEvent()) { spDriver->clearBuffers(); mesh->turn(dim::vector3df(0.1, 0.5, 0.25)); spSceneMgr->renderScene(); spDriver->flipBuffers(); } deleteDevice(); return 0; } |